Know your arsenal
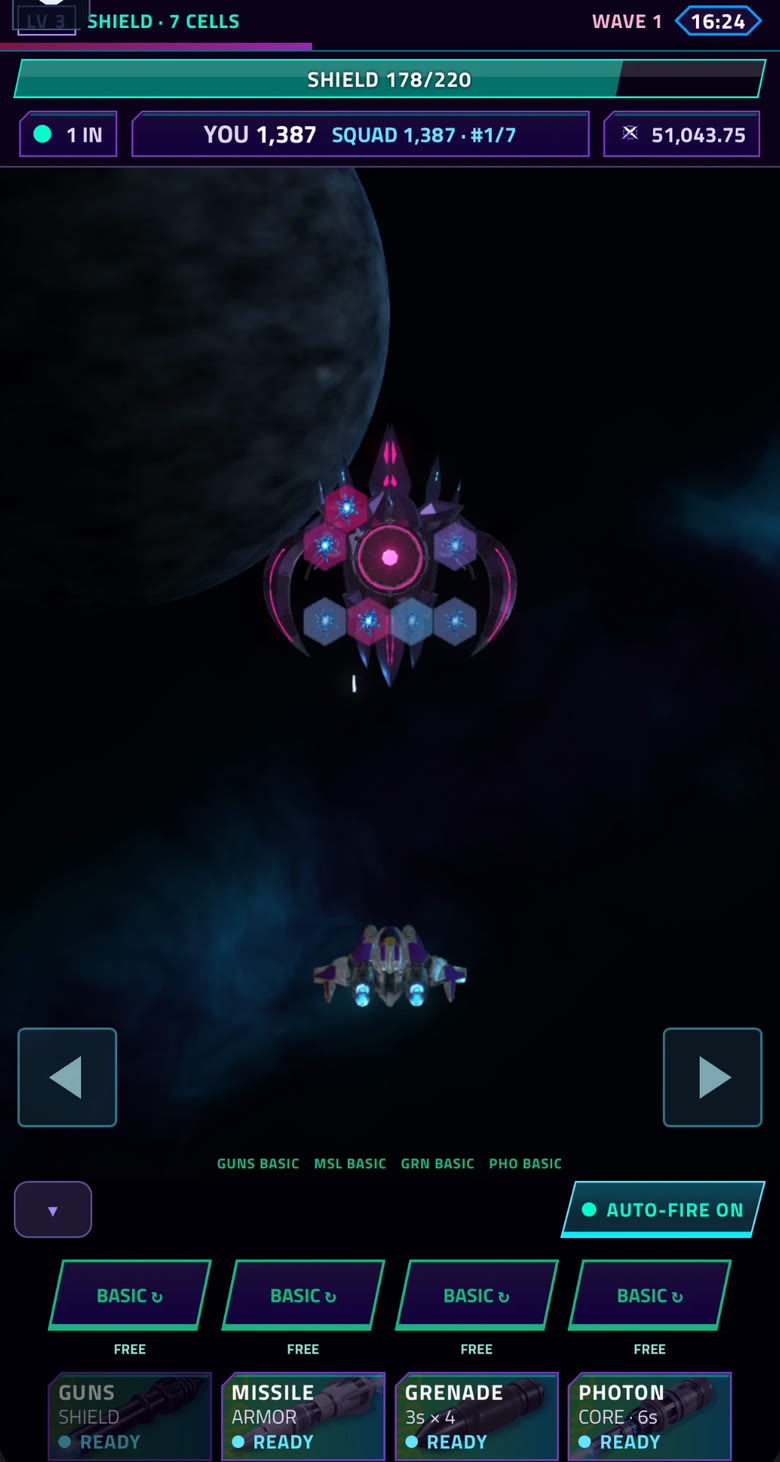
| Weapon | Best fit | Cooldown | How it works |
|---|---|---|---|
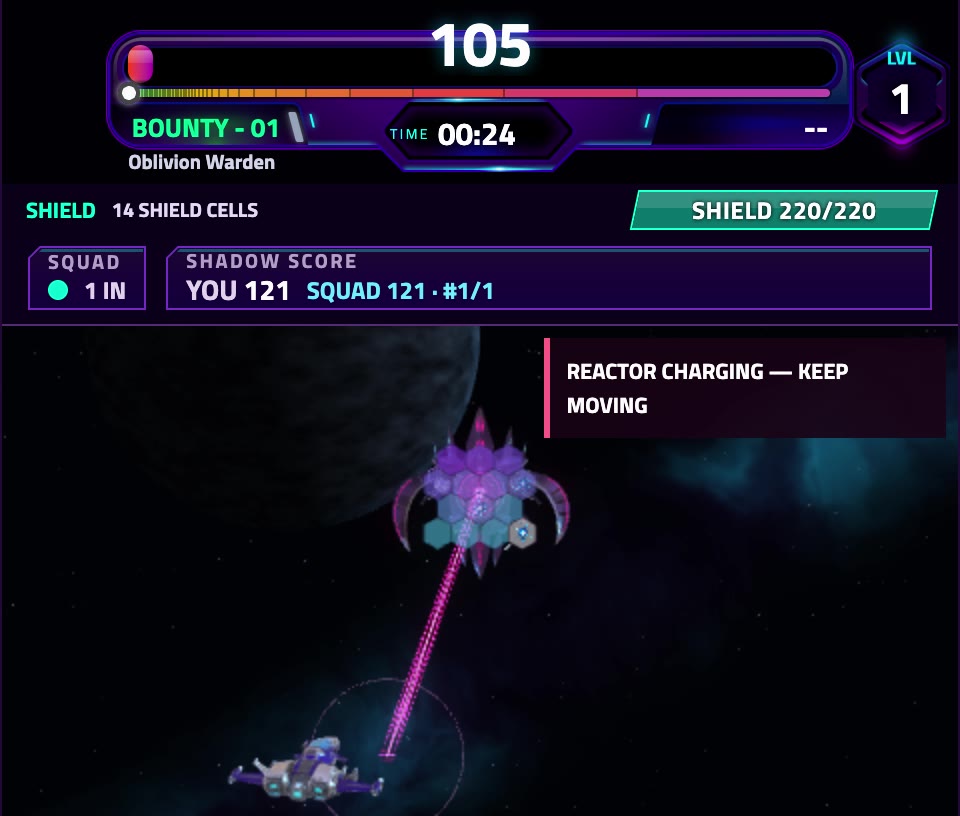
| Guns | Shield cells | 0.16 seconds | Repeated aimed shots. Keep your fire on an intact cell. |
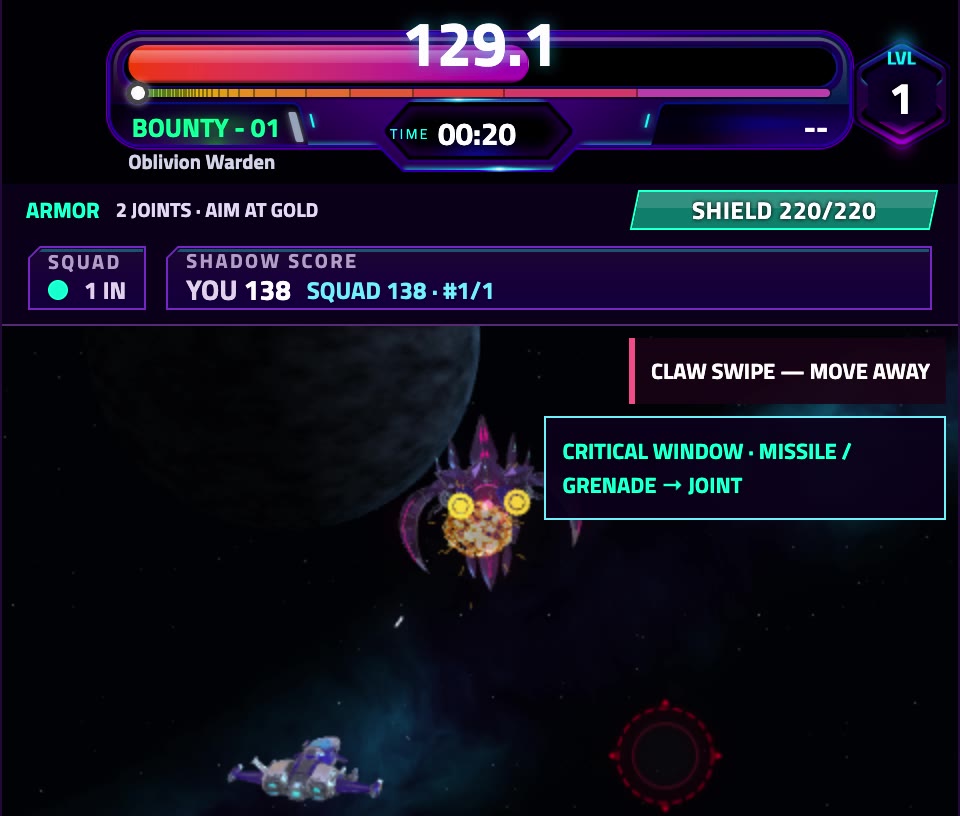
| Missiles | Armor joints | 5 seconds | A travelling projectile. Aim at a joint and allow for flight time. |
| Grenades | Armor joints | 8 seconds | Attach to a surface and deliver timed damage pulses. |
| Photons | Exposed core | 11 seconds | A pulsed beam. Maintain contact with the exposed core. |
Your aim, target choice and timing determine how much useful damage each activation delivers.
Follow through with grenades and photons
A grenade delivers up to four pulses, three seconds apart, after attaching. If its target breaks, the sequence can end early. Choose a joint with enough life left to make those pulses count.
A photon channel lasts up to six seconds, with cooling gaps between active pulses. Track the core throughout the channel so the beam connects when damage pulses are active.
Select. Aim. Launch.
Select the missile, grenade or photon card, then click or tap a target in the arena. Select the same card again to cancel.
Check its cooldown before committing to your next opening. Allow for missile travel time and avoid launching a special at a target that is about to break.
IN THE ARENA
Select your special. Then pick its target.
- Choose a weapon card, then click or tap in the arena.
- Aim missiles and grenades at an exposed gold joint.
- Check the phase before spending an activation.
Put the loadout to work
Open with guns to strip the shield. Switch to missiles and grenades as soon as the joints become available. Keep photons ready for the exposed core.
For a full fight walkthrough, read boss phases and survival. For the inputs, see controls and movement.
Keep building your skills.
Learn the targets, get comfortable with your controls and make every opening count.
Explore the field manual